There are few prerequisites before you can start installing DPM. DPM 2016 needs to run on Windows Server 2012 R2 or 2016 (Datacenter or Standard edition). So, first you need to decide which version of Windows Server you want to use. For sake of simplicity and long-term support we will use Windows Server 2016 Standard. Next decision is which platform you want to install your server on. You can choose to run it on dedicated physical server or as virtual machine. If you decide to run it as VM, you can easily change Windows Server resources values to accommodate the workload which is more difficult with physical server implementation. VM DPM server can be implemented on one of this three virtualization platforms: Hyper-V, Azure or VMware. Our platform of choice will be Hyper-V on Windows Server 2016 physical server.
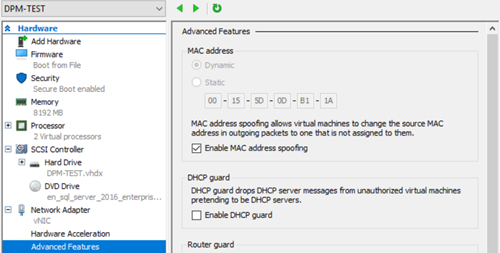
Depending on your workload and placement of your SQL instance, you need to create appropriate VM. For our needs it will have 2x vCPU, 8192MB RAM and 127 GB vdhx Gen 2 dynamic disk. After installing and patching Windows Server 2016 on our new VM, you should name it according to your corporate scheme and join it to your local domain. It is also necessary, before you add Hyper-V role to your new DPM VM, to open VM’s settings and on Advanced Features of its Network Adapter check Enable MAC Address Spoofing checkbox:
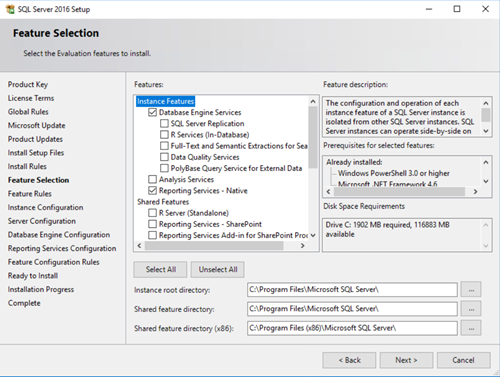
Next in line of prerequisites is SQL Server. DPM 2016 supports only 64-bit Enterprise or Standard versions of Microsoft SQL Server 2012 SP2, 2014 and 2016. For use of SQL 2016 SP1 you need to install Update Rollup 2 or later for DPM 2016. So, we will be using SQL Server 2016 RTM Standard for installation of DPM and after installing Update Rollup 4 (currently latest) to DPM we can upgrade SQL 2016 with SP1. Before we start with SQL instance installation we need to be aware that it can be also installed on another server but then we must take additional steps of firewall and port configuration that will not be discussed here because we will install local SQL server on our DPM VM. Also, you need to create Microsoft Active Directory User accounts on your Domain Controller as service accounts for running SQL Database Instance, SQL Reporting Instance and SQL Agent. After that you can start SQL Server stand-alone installation. Use named instance and set it to something like SCDPM. You need only two server components: SQL Server Database Engine and Reporting Services:
It is also important to set the right collation that is: SQL_Latin1_General_CP1_CI_AS. Only thing left after successful SQL Server installation is to install SQL Server Management Studio version 16.5 or earlier. You can also install newer versions like SSMS 17 if you need it but without SSMS 16 DPM installation will failed.
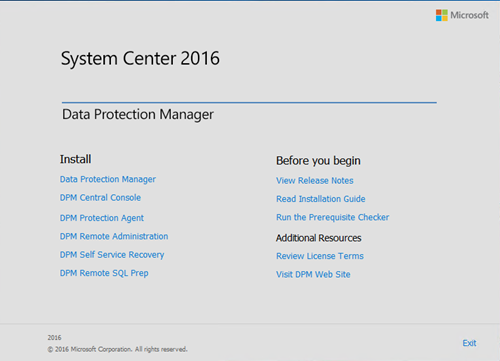
After meeting all before mentioned prerequisites we can start with DPM installation. If all is set correct, it is a-straightforward process. It is best that user account under which we are running installation process has sysadmin role on SQL instance we want to use for DPM, but it is not necessary. First, we need to extract files from downloaded DPM ISO media and in extracted folder find and start setup.exe. After that we will see splash screen and click on Data Protection Manager link to start installation:
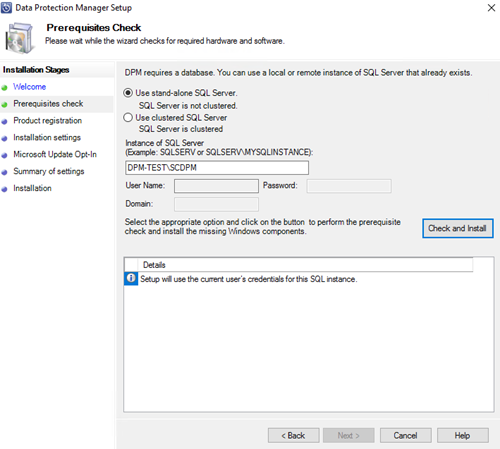
After accepting Microsoft license terms and conditions we will have to set right SQL instance for our server. In our case that will be DPM-TEST\SCDPM:
In Product Registration you must enter your and your Company name as well as valid Product key. You can also set where on disk you want to install DPM and Required and Available disk space for complete installation. If you have enough disk space, you may choose to use or not to use Microsoft Update for getting DPM updates. Finish the wizard and after installation is completed you will get message that installation has completed successfully, and then you can click close.
Before we start using our new DPM we must provide storage for it. We can divide storage solutions to Short-term and Long-term. In general disks represent Short-term and tapes Long-term backup solution. But there is third option that can be either depending on configuration, and that is Azure cloud. First, we will talk about disks. On hardware level concerning redundancy, it is important that disks we will use as our DPM storage are configured in RAID, preferably RAID 10. But before you can add disks to DPM storage pool they need to be connected to DPM server by one of these methods: Direct attached storage (DAS), Fiber Channel storage area network (SAN), iSCSI storage device or SAN. Using Network-attached storage (NAS) as iSCSI storage device is a cheap and flexible solution for small to medium environments. Most NAS devices have web-based wizard interface to create the iSCSI target with a mapped LUN. For security you can also set CHAP authentication on iSCSI target. After iSCSI target is named and created, next step is to start Microsoft iSCSI service on our DPM server by selecting iSCSI Initiator from Tools drop down menu in Server Manager console. When the service is started you can use iSCSI Initiator console to connect to iSCSI Target. In that console go to Discovery tab and click on Discovery Portal where you need to enter static IP address of your NAS. After that go to Targets tab and click Refresh and you will see your new target in Discovered targets list. Select the target and click Connect:
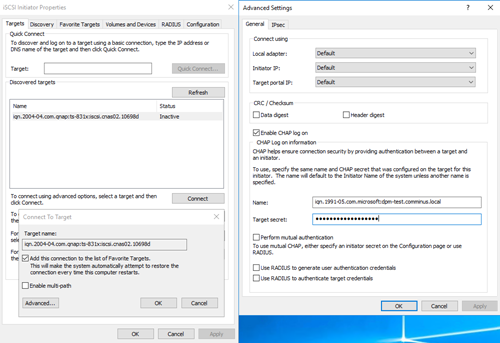
If you have configured CHAP, you will need to click on Advance and set additional parameters before clicking OK and finally you're connected to the target. In Disk Management tool you will then find new disk that needs to be initialized and formatted with Resilient File System (ReFS). It is needed if you want to use newest DPM feature called Modern Backup Storage (MBS) that provides many benefits as faster backups and storage space savings.
This is the end of setting basic DPM installation and disk storage preparation for DPM use. In Part 2 post we will dive in basics of configuring settings in DPM management console to prepare it for backup and recovery operations. Until then stay tuned to Comminus Blog.
References: