You could run the same setup that you have on your on-premise system on Azure as “Infrastructure as a Service” which are VM’s but then this isn’t some improvement because what you basically do is “cloning” your on-premise VM to Azure which can be additional expense. Also, there are Cloud Applications (Cloud Services) where you can run anything in an Azure-managed VM under Worker Roles. This will do the job but you have complex configuration to run even the simplest background job. Clearly, we have a challenge in front of us!
How can I run time or resource consuming tasks in a web site background?
The answer for the challenge is Azure WebJobs which make development, running and scaling of a background tasks easy. Also, they are hosted under Azure WebSites so you don’t need to create other service on Azure or spend additional time for integration and stuff. WebJobs enables you to run scripts or programs as background processes. Wait, you said: “run scripts”? Yes, you can run any executable file (or script) such as a cmd, bat, exe (.NET), ps1, sh, php, py, js and jar and what is even better you will get a tons of features around them, like debugging, scaling, scheduling, instrumentation. You can run WebJobs on demand (triggered), continuously or on schedule.
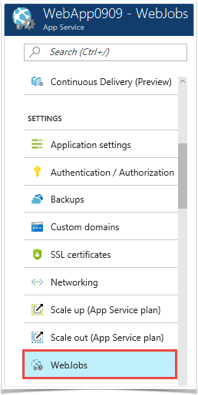
Here's some scenarios where you could use Azure WebJobs:
- CPU-intensive work (eg. Image processing)
- Queue processing with Azure Storage Queue
- File maintenance, loading files or cleaning up log files
- Replacement for SQL Jobs for executing long-running tasks
- Sending e-mails with SendGrid or Office365
How can I start building Azure webJobs
Obviously, you will need to have an Azure Subscription but let’s assume that this prerequisite is fulfilled. Since we will build the background task by using .NET we need some instance of the Visual Studio. If you're using Visual Studio 2015, install the
Azure SDK for .NET (Visual Studio 2015). If you're using Visual Studio 2017, install the
Azure development workload.
Now that we have everything let’s create a new WebJob by creating a new Cloud Template Azure WebJob:
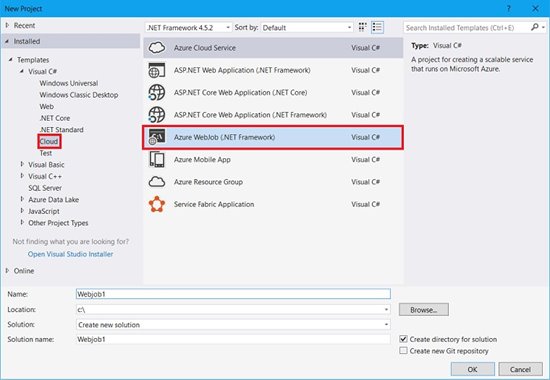
Now that we have our template let’s change the Main method so that we could run continuous running WebJob by using Timers. First we need to add Microsoft.Azure.WebJobs.Extensions through NuGet Package Manager. This will add additional triggers, binders to WebJobs. Now let’s add UseTimers method in JobHostConfiguration and call our function on the JobHost.
You maybe ask yourself what does the: “Please set the following connection strings in app.config for this WebJob to run: AzureWebJobsDashboard and AzureWebJobsStorage” means? For running WebJobs on Azure you need to have Storage Account service.
This is used for two reason:
- Azure Storage is a data component extension to your Azure Storage for triggered operations with queue, blobs or tables (NoSQL)
- WebJobs is using Storage Account for storing logs.
When you create your Storage Account go to the Manage Access Keys section and take the connection string and use them in your WebJob. You can use the same Azure Storage account for both connection strings.
Now that we add the keys we can create our
TimerFunction method inside of a
Functions class:
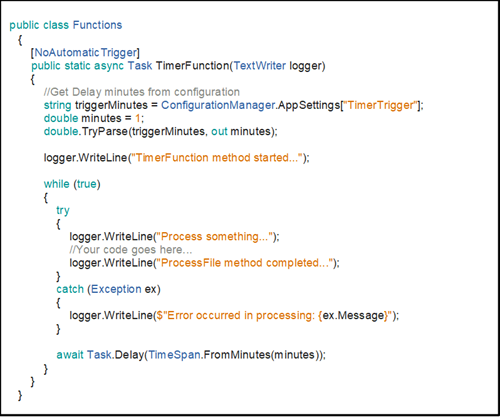
Please notice that the name of the class and method is used in Main method for calling the method that will be executed in continuously running webjob:
host.CallAsync(typeof(Functions).GetMethod("TimerFunction"));
Also in the implementation of the WebJob method the [NoAutomaticTrigger] attribute is used which marks the function to be run continuously and the code for a continuous job is written to run in an endless loop (Continuously running WebJobs needs to be written in an endless loop). Please keep in mind the following when you develop this type of WebJobs:
A web app can time out after 20 minutes of inactivity. Only requests to the scm (deployment) site or to the web app's pages in the portal reset the timer. Requests to the actual site don't reset the timer. If your app runs continuous or scheduled WebJobs, enable Always On to ensure that the WebJobs run reliably. This feature is available only in the Basic, Standard, and Premium pricing tiers.
And that is basically all. After you fill the logic in the ''Your code goes here...'' line, your WebJob is ready. Also, since you have injected TextWriter instance and use this for logging you don’t have to worry about logging because Azure will take care of that. Let’s deploy the WebJob on Azure. When you create new App Service you on Azure you can download publish profile, also you can create a new App Service plan during the publish process. How to publish? Easy, Just Right-click your WebJob project and select “Publish as Azure WebJob…”
.png.aspx)
The new WebJob appears on the WebJobs page from where you can stop, restart, delete, set the properties or view the log of all your WebJobs.
.png.aspx?width=500&height=276)
Remember the injected
TextWriter object? When you select the WebJob for which you want to see the execution log and select the Logs button:
.png.aspx?width=500&height=247)
You will be redirected to WebJobs details page where you will see all executions of the WebJob and you can examine each one individually:
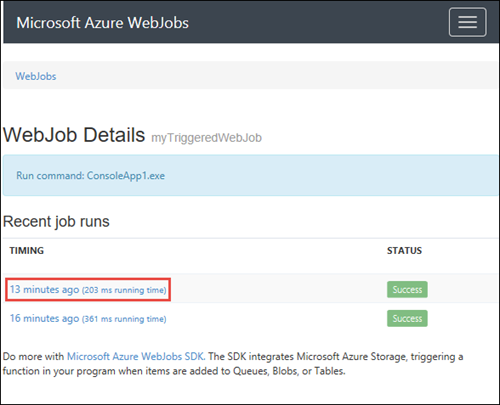
On the WebJob run details page you can select Toggle Output button and you will see the logs that are generated by using
TextWriter object.
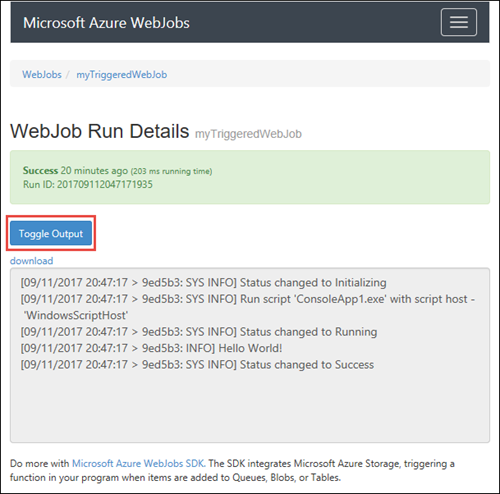
Our continuously running WebJob is up and running! In the next blog post we will examine on-demand (triggered) WebJob by using Azure Queue Storage service.